In our journey towards a more sustainable world, reducing waste emerges as a pivotal action each of us can take. DIY projects play a crucial role in this endeavor, offering a creative and impactful way to minimize our environmental footprint. Crafting your own reusable food storage solutions not only contributes to waste reduction but also brings a unique satisfaction. Imagine the joy of using items that you've made with your own hands, knowing they're keeping plastics out of our oceans and landfills. This guide aims to inspire and equip you with the knowledge to embark on your own DIY reusable food storage projects, enhancing both the health of our planet and the coziness of your kitchen.
In This Article
- Getting Started with DIY Projects
- Simple Projects to Kickstart Your Creativity
- DIY Beeswax Wraps
- Creating Silicone Food Bags
- Upcycling Projects for Food Storage
- Sewing Your Own Fabric Food Bags
- Advanced DIY Projects
- Maintaining and Caring for Your DIY Projects
- Call to Action
Getting Started with DIY Projects

Starting your DIY adventure doesn't require you to be a crafting expert. With a few basic materials and tools, anyone can create effective and eco-friendly food storage solutions. Begin by gathering essentials like beeswax, cotton fabric, silicone, and sewing supplies, depending on the project you choose. Planning is key—decide which items you use most frequently in your kitchen and aim to replace those with your homemade alternatives.
Simple Projects to Kickstart Your Creativity
- Beeswax Wraps: An excellent alternative to cling film, perfect for wrapping sandwiches or covering bowls.
- Fabric Produce Bags: Say goodbye to plastic produce bags by sewing your own reusable fabric versions.
These projects are not only manageable for beginners but also immensely rewarding, offering a practical entry point into the world of DIY sustainability.
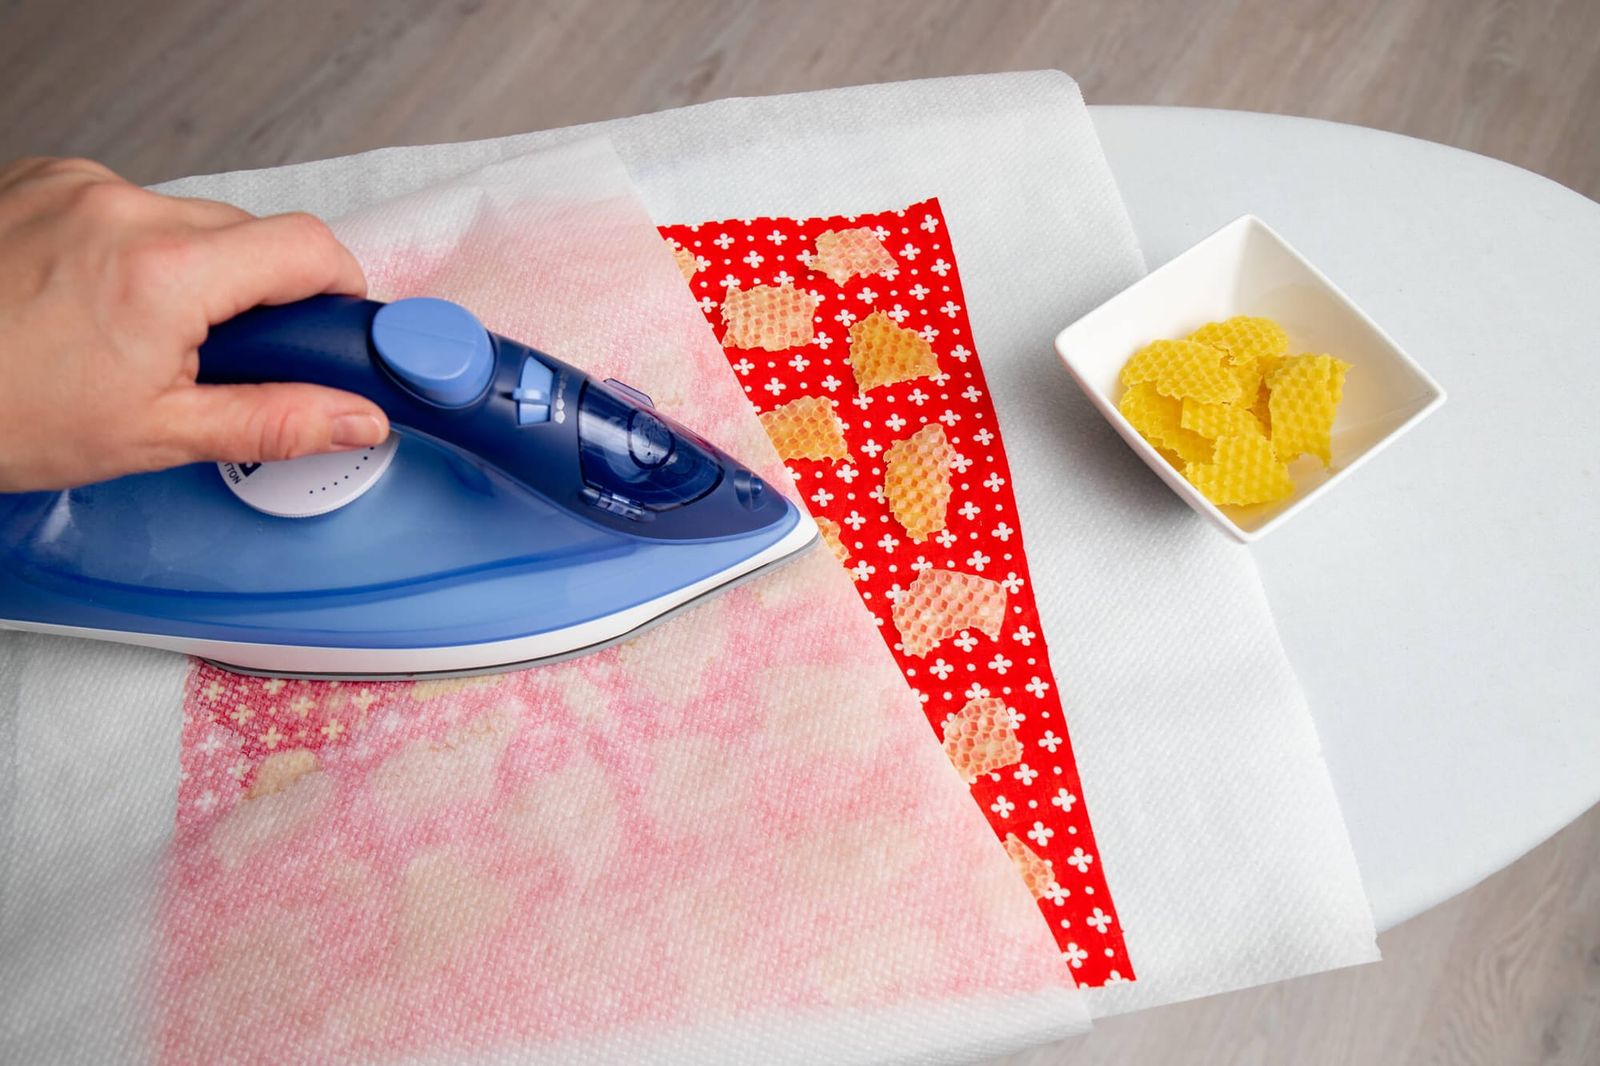
DIY Beeswax Wraps
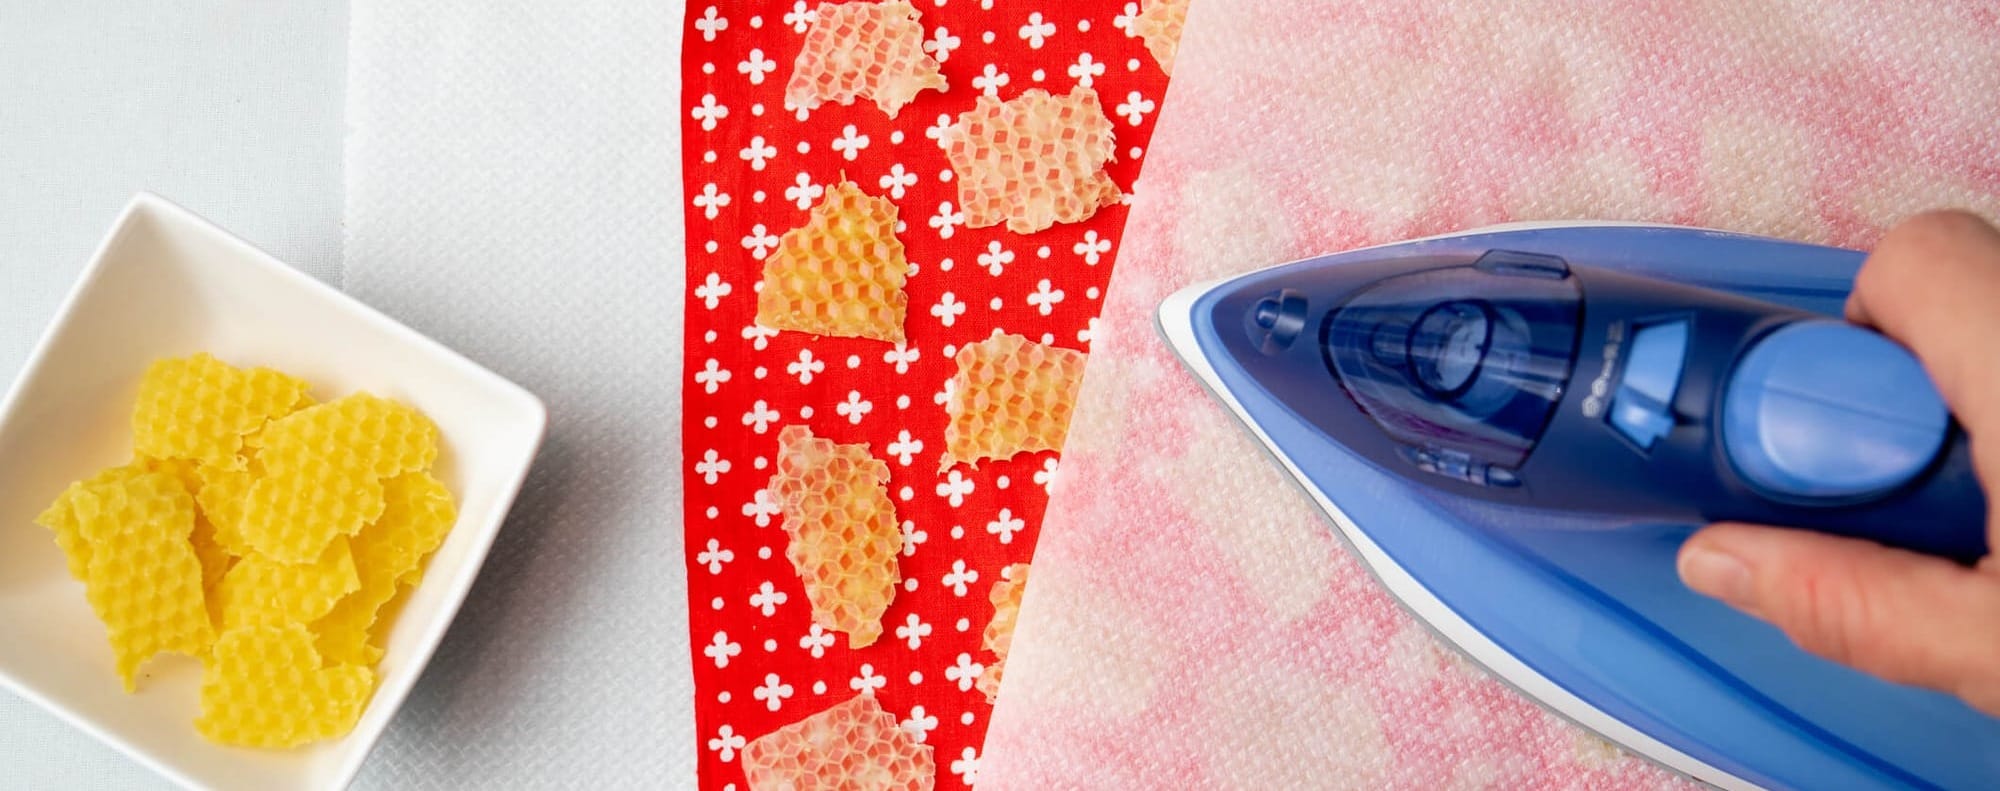
Beeswax wraps are not just a sustainable choice; they're also practical and versatile. They breathe better than plastic, keeping your food fresh longer without sweating. Use them to wrap cheese, bread, fruits, and vegetables, or cover bowls. To clean, simply wash in cool water with a mild soap and air dry.
Materials Needed:
- 100% cotton fabric (preferably organic), cut into desired sizes
- Beeswax pellets or blocks
- Pine resin (optional for added stickiness)
- Jojoba oil (optional for flexibility)
- Parchment paper
- Old paintbrush (not to be used for food afterward)
- Baking sheet
Process:
- Preheat your oven to 185°F (85°C).
- Place your fabric on a baking sheet lined with parchment paper.
- Sprinkle a uniform layer of beeswax pellets over the fabric. If using, add a sprinkle of pine resin and a few drops of jojoba oil.
- Place in the oven for 5-10 minutes or until the beeswax melts completely.
- Use the paintbrush to spread the melted mixture, ensuring the fabric is fully coated.
- Hang or lay flat to cool and harden.
This video Making Reusable Beeswax Wraps will provide you a visual for making reusable beeswax wraps as an alternative to plastic wrap.
Creating Silicone Food Bags
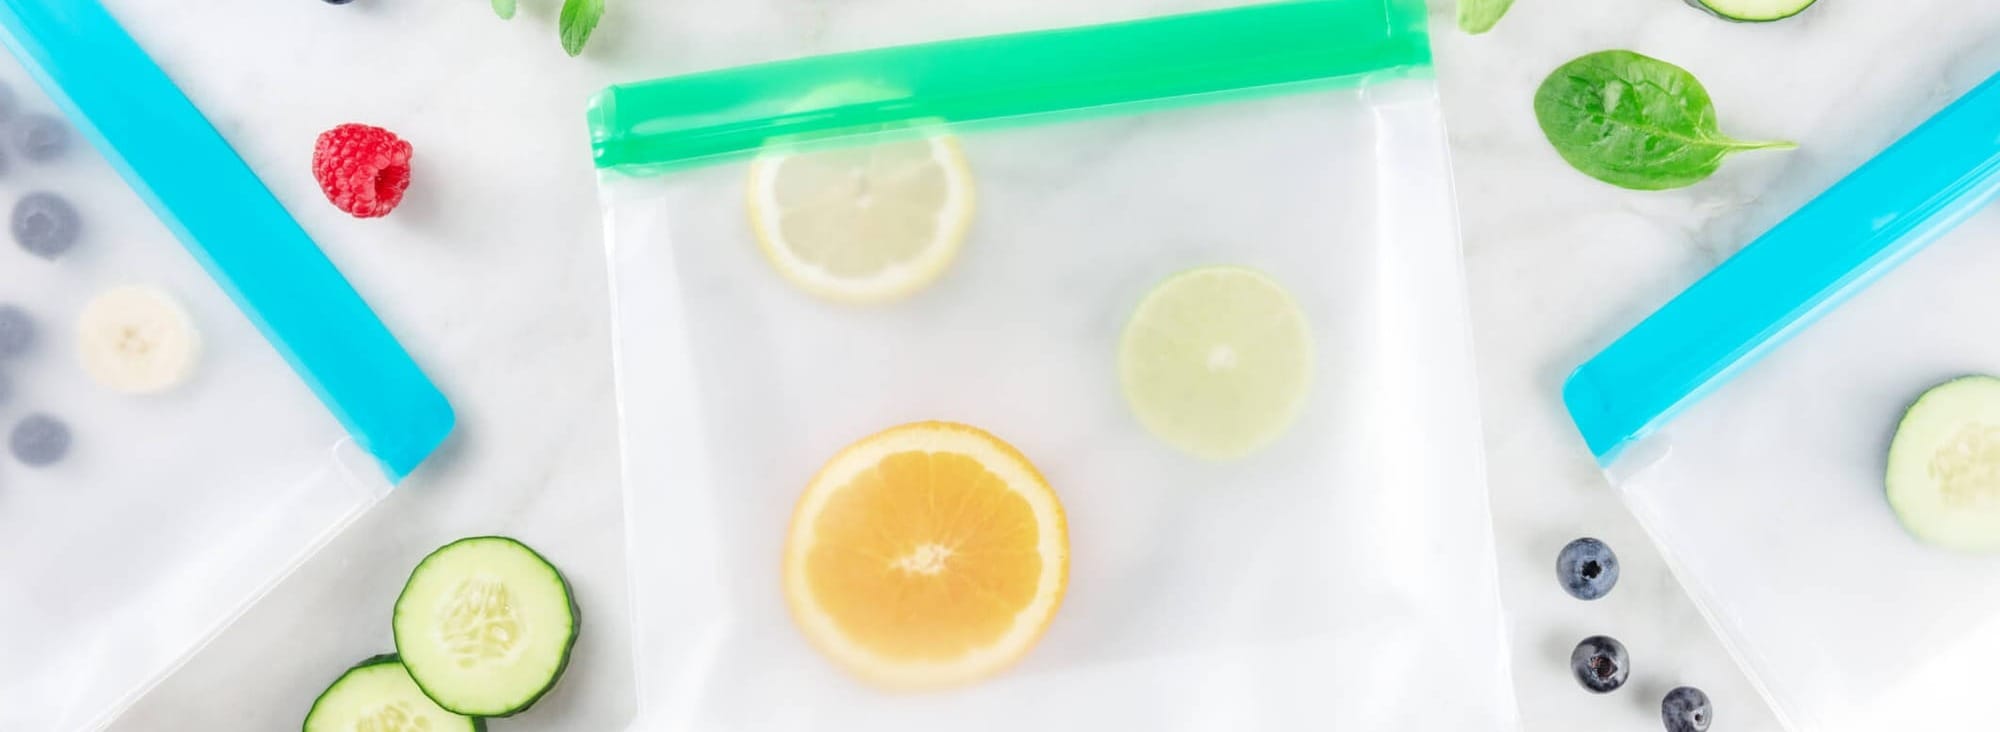
Making silicone food bags at home is a fantastic way to further your commitment to sustainability. Silicone bags are durable, versatile, and, most importantly, reusable, making them an excellent alternative to single-use plastic bags.
Advantages of Silicone Bags
Silicone bags offer numerous advantages over traditional plastic bags:
- Durability: They can withstand extreme temperatures, from the freezer to the microwave, without degrading.
- Safety: Food-grade silicone doesn't leach chemicals into food, unlike some plastics.
- Versatility: Use them for everything from storing leftovers to sous-vide cooking.
Materials and Safety Tips
Before you start, it's crucial to source high-quality, food-grade silicone. This ensures that your bags are safe for storing and coming into contact with food.
Materials Needed:
- A silicone mold or a DIY mold made from cardboard and parchment paper for shaping
- A caulking gun and clear, food-grade silicone sealant
- Scissors for trimming and shaping your bags
- A ruler or measuring tape for precision
Safety Tips:
- Work in a well-ventilated area to avoid inhaling fumes from the silicone sealant.
- Wear gloves to protect your hands during the process.
Instructions
- Prepare your mold to the desired size and shape of your bag, using cardboard and parchment paper for a DIY approach.
- Fill the caulking gun with your food-grade silicone sealant.
- Carefully fill the mold with silicone, ensuring an even spread to avoid thin spots.
- Allow the silicone to cure as per the manufacturer's instructions—usually 24 hours.
- Once cured, gently remove the silicone from the mold and use scissors to shape the bag, including creating a sealing mechanism or adding a zipper if desired.
Upcycling Projects for Food Storage
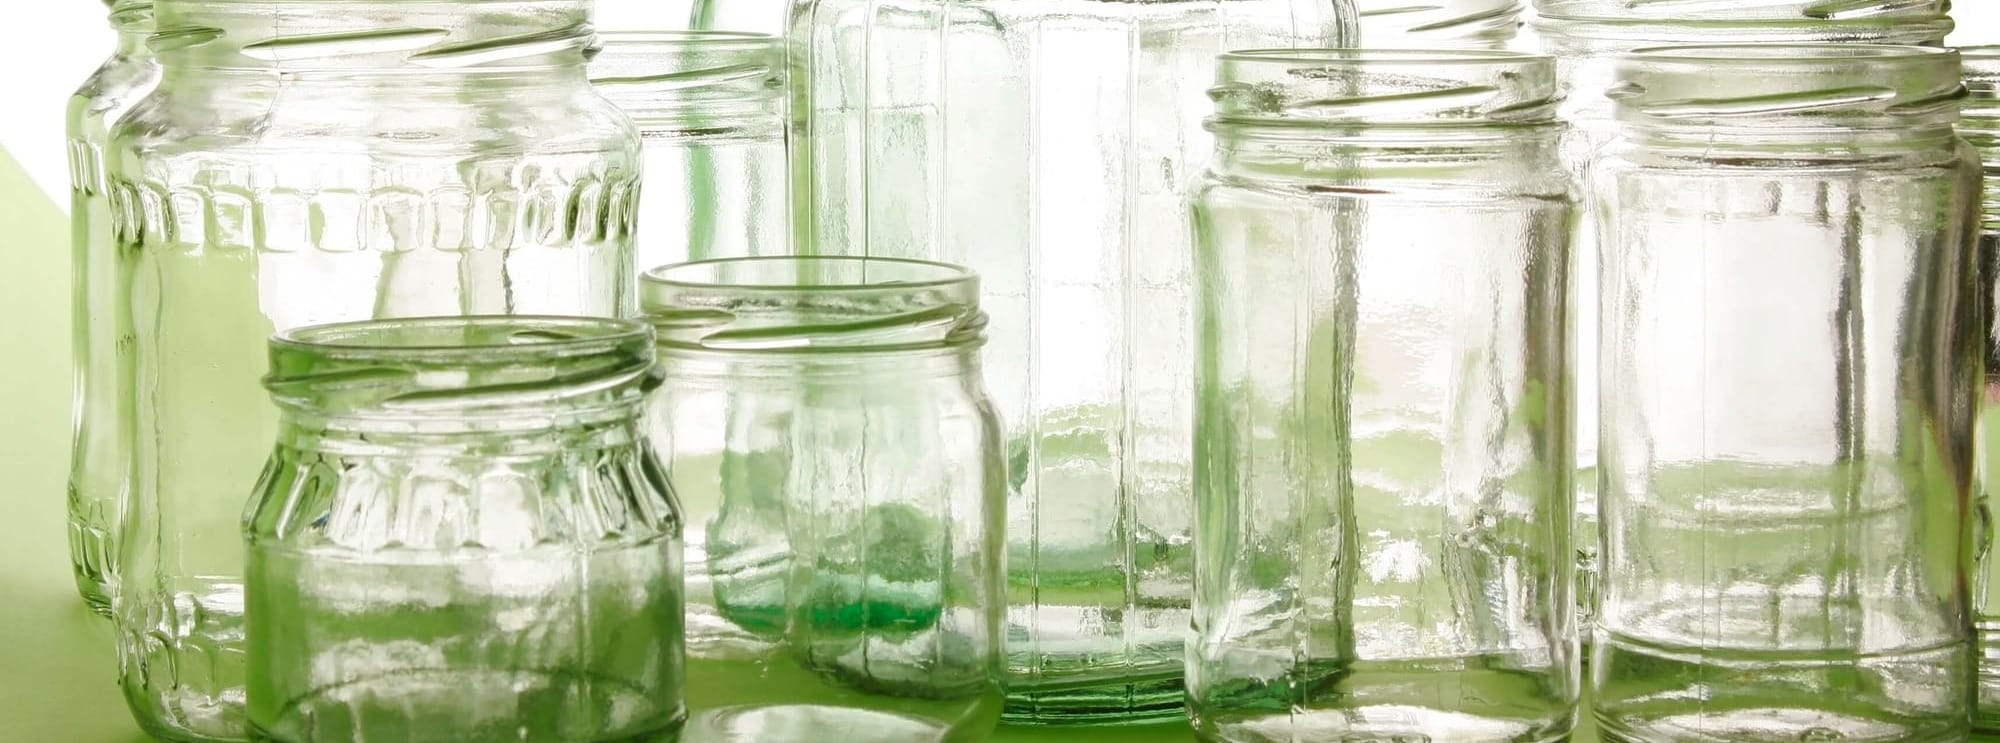
Upcycling is not just a way to reduce waste; it's a creative process that transforms everyday items into valuable food storage solutions. One of the simplest and most impactful ways to start is by repurposing glass jars.
Ideas for Upcycling
- Glass Jars: Collect glass jars from pasta sauces, pickles, or jams. Clean them thoroughly, remove labels, and you have a set of airtight containers perfect for storing dry goods, leftovers, or even as to-go cups.
- Tin Cans: Cleaned tin cans can be turned into countertop utensil holders or small planters for herbs.
- Plastic Containers: Large yogurt or ice cream tubs can be reused for bulk storage of grains or as freezer containers.
Decorating and Sealing
To make your upcycled containers more functional and attractive:
- Use paint or adhesive paper to decorate the exteriors, turning them into decorative pieces for your kitchen.
- Replace old or worn lids with new, airtight ones to enhance their usability.
- For glass jars, consider adding chalkboard labels to write contents and dates, making organization a breeze.
Sewing Your Own Fabric Food Bags
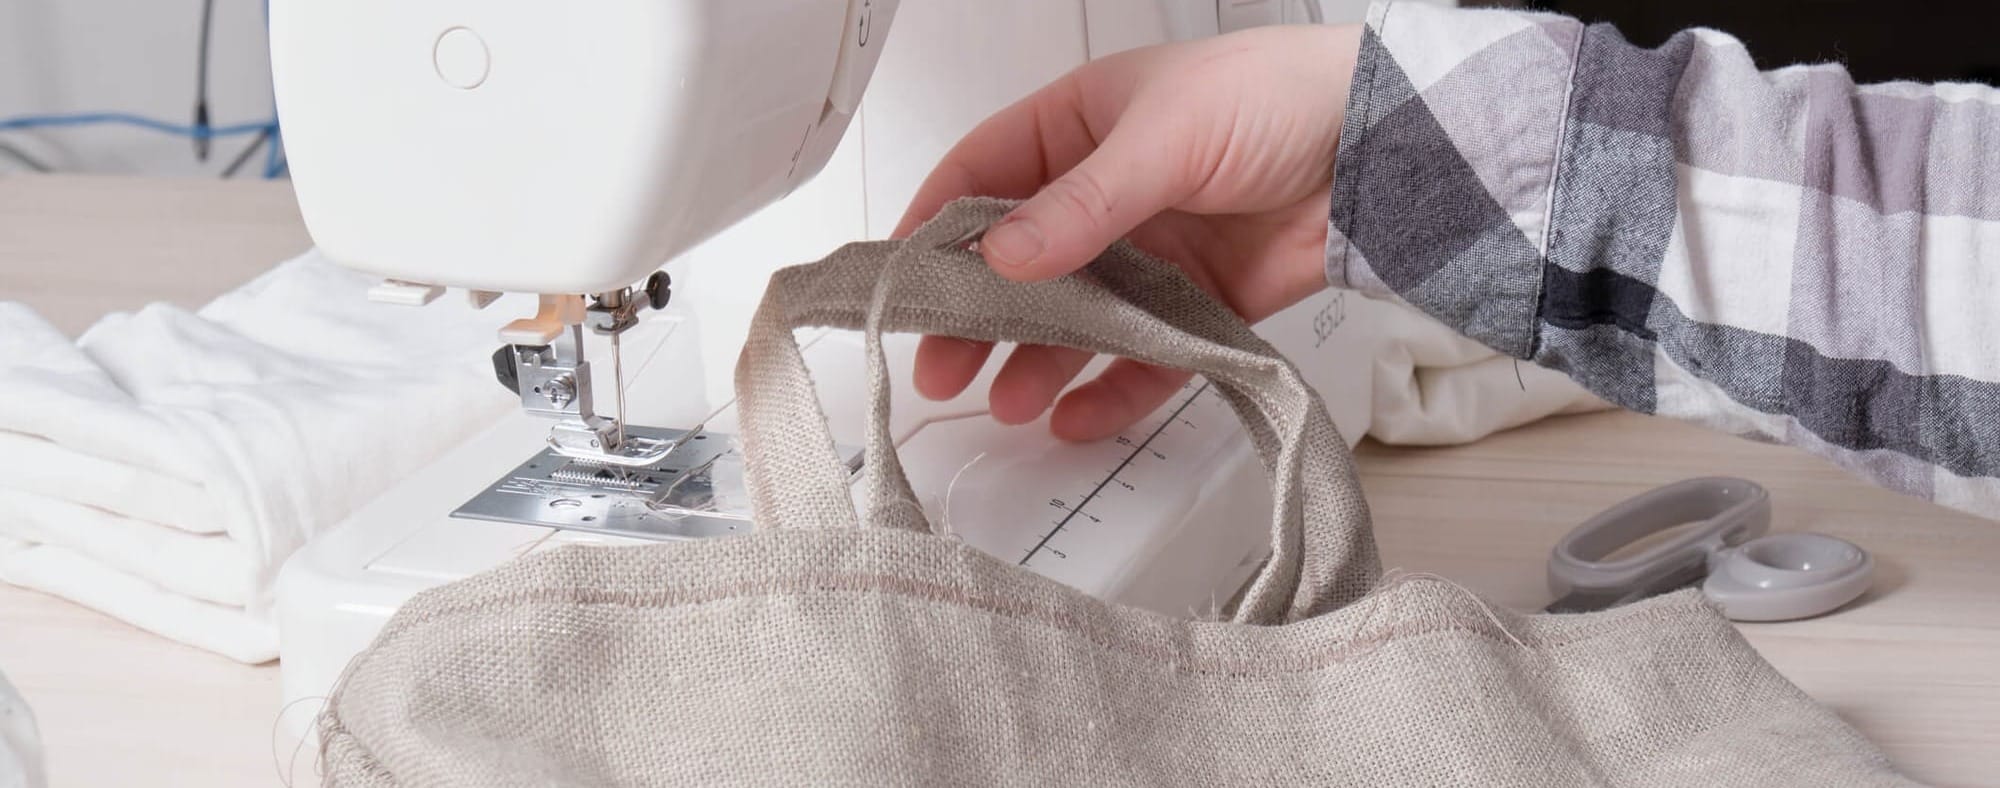
Crafting Custom Reusable Bags
Sewing your own fabric food bags is a rewarding project that results in personalized and eco-friendly kitchen storage. These bags are perfect for fruits, vegetables, nuts, and even bread.
Choosing the Right Fabric and Patterns
- Fabric: Opt for natural fibers like cotton or linen for their breathability and durability. Consider organic fabrics to further reduce environmental impact.
- Patterns: Start with simple drawstring or zipper bags. There are numerous free patterns available online suitable for various skill levels.
Sewing Instructions
- Cut your fabric according to the pattern.
- If making a drawstring bag, fold the top edge to create a channel for the drawstring. Sew in place.
- Sew the sides of the bag, right sides together, leaving the top open.
- Turn the bag right side out, and thread the drawstring through the channel.
- For zipper bags, attach the zipper along the top edge before sewing the sides.
Maintenance Tips
- Wash fabric bags regularly in cold water to prevent shrinkage and maintain hygiene.
- Air dry to preserve the fabric's integrity and avoid wrinkles.
- Iron on a low setting if necessary to keep them looking neat.
Advanced DIY Projects
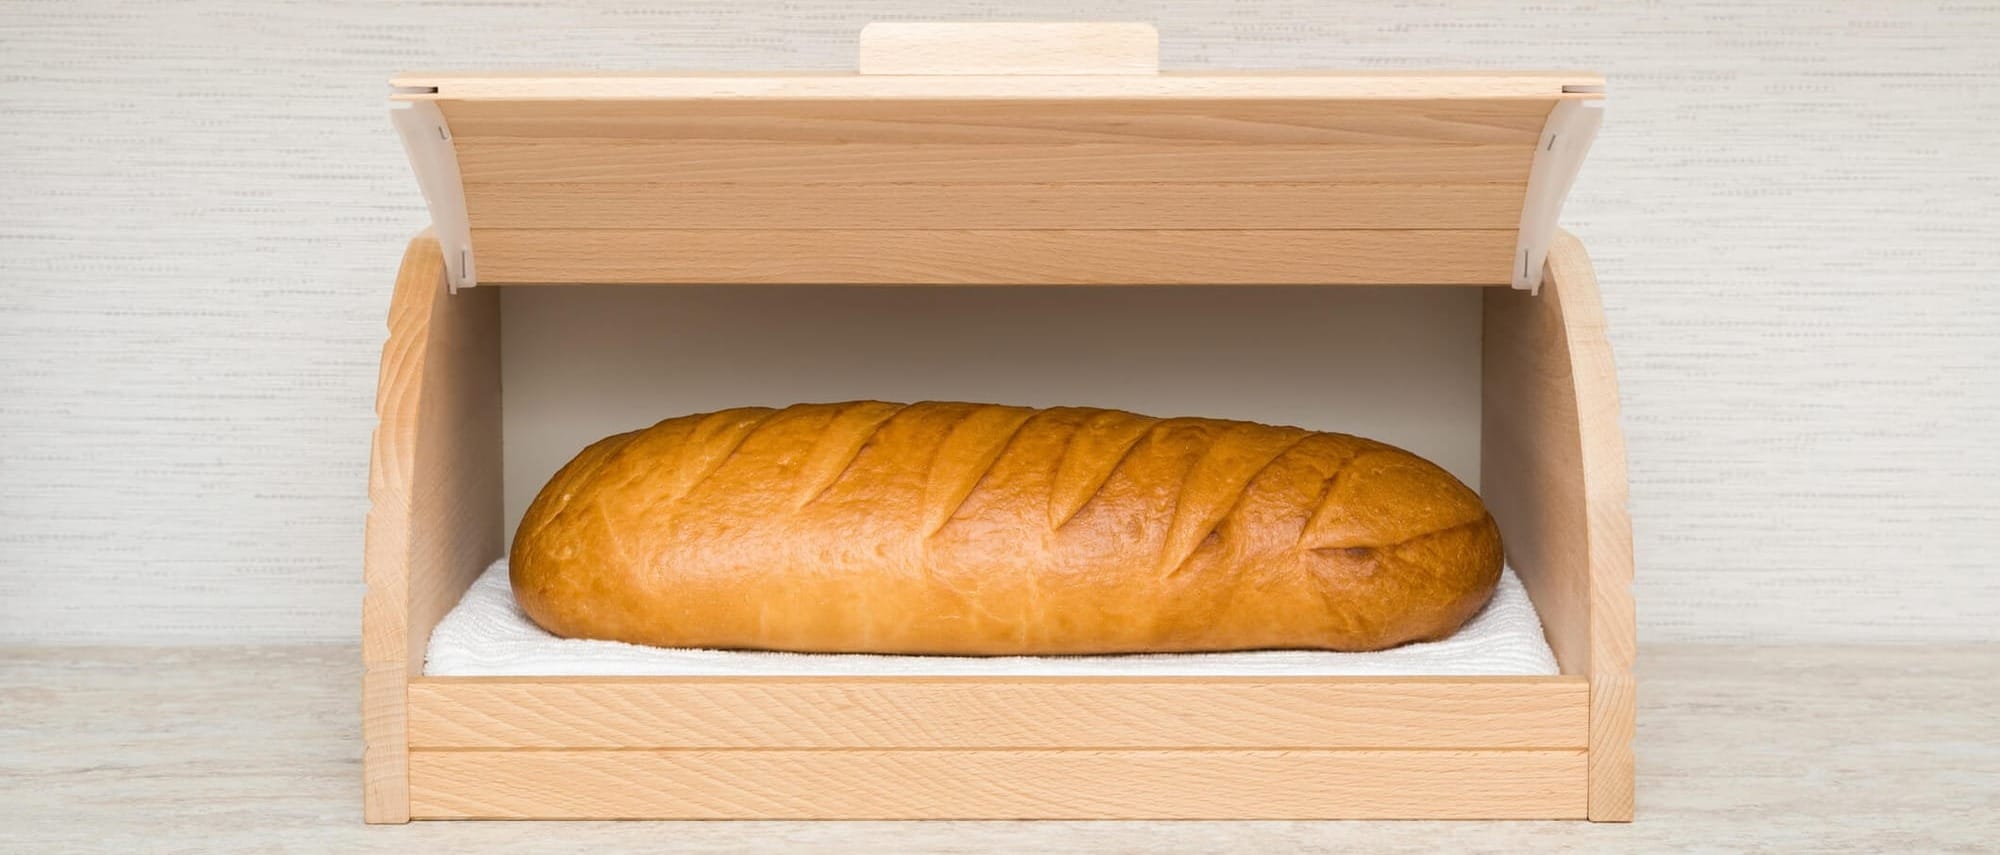
For the DIY enthusiast ready to tackle more complex projects, creating airtight containers or constructing a wooden bread box can be rewarding challenges. These projects not only enhance your kitchen's sustainability but also add a personal touch to your space.
Creating Airtight Containers
- Materials Needed: Glass jars with wide mouths, silicone gaskets, and clamps or latches for sealing.
- Tools: Silicone sealant, measuring tape, and possibly a drill if you're adding latches to glass jars.
- Process: Measure and cut silicone gaskets to fit the jar's lid. Apply a thin layer of silicone sealant to the gasket and attach it to the lid, ensuring a snug fit. For jars without built-in sealing mechanisms, you can attach clamps or latches using a drill and screws, ensuring the lid closes tightly.
Building a Wooden Bread Box
- Materials Needed: Quality wood (like cedar or bamboo for their natural antibacterial properties), hinges, and a knob or handle.
- Tools: Saw, drill, sandpaper, screws, and wood glue.
- Process: Cut the wood to your desired dimensions, considering enough space for ventilation to keep bread fresh. Assemble the box using screws and wood glue for stability. Sand the box for a smooth finish, and attach the hinges and handle. You can also add a small cloth liner to absorb moisture.
Tips for Success
- Plan Ahead: Detailed planning and precise measurements are crucial for these projects. Sketch your design or follow a detailed plan to ensure all pieces fit together correctly.
- Choose Quality Materials: The longevity of these projects depends on the materials used. Opt for durable, food-safe materials that will withstand regular use.
- Safety First: Always prioritize safety when using power tools. Wear protective gear and work in a well-ventilated area.
Resources
- Online tutorials and woodworking plans can provide step-by-step guidance for these projects.
- Local woodworking or DIY workshops can offer hands-on experience and advice.
Maintaining and Caring for Your DIY Projects

Creating your own reusable food storage solutions is a rewarding endeavor, but to ensure these items serve you well over time, proper care and maintenance are key. Different materials require different care strategies to maintain their functionality and appearance.
General Maintenance Tips
- Regular Cleaning: Clean your DIY items after each use to prevent buildup of residues and odors. Use mild detergents and avoid harsh chemicals, especially on natural materials like wood and fabric.
- Proper Storage: Store your DIY food storage solutions in a dry, cool place to prevent damage. For items like beeswax wraps, roll rather than fold to avoid creases that can break down the wax.
- Periodic Inspection: Regularly check your items for signs of wear and tear. For beeswax wraps, re-wax if they start to lose their stickiness. Inspect silicone bags for tears and repair or replace them as needed.
Cleaning Tips for Different Materials
- Beeswax Wraps: Wash in cool water with a mild soap. Avoid heat, which can melt the wax. Air dry before storing.
- Silicone Bags: Dishwasher safe, but can also be hand-washed. For stubborn stains or odors, soak in a mixture of baking soda and vinegar.
- Fabric Food Bags: Machine washable in cold water. Tumble dry low or air dry. Iron on a low setting if necessary.
- Wooden Items: Wipe with a damp cloth and mild detergent. Do not soak in water. Occasionally treat with mineral oil to maintain the wood's natural luster.
- Glass Containers: Dishwasher safe. For handwashing, use warm soapy water and a soft sponge to avoid scratches.
Call to Action
Dive into the world of DIY and start crafting your own reusable food storage solutions today. Not only will you reduce waste, but you'll also add a personal touch to your kitchen. Share your creations and experiences online to inspire others and build a community of eco-conscious DIYers. We'd love to see what you've made and hear any tips or tricks you've discovered along the way. Together, we can make a difference, one DIY project at a time.
